How to Build a Subwoofer Box in 2026
I would like to start by saying I know there are store-made subwoofer boxes, but this article will show you how you can build your subwoofer box. Doing it yourself means you can design it however you want, and you can get the look and the size you wish to, not mentioning of course, that it is also cheaper.
I will show you how to build a subwoofer box, the measurements, and all the math involved. I will also give you step-by-step instructions on how you can build different sized subwoofer boxes.
Requirements
- Jigsaw
- Circular saw, or table saw
- ¾ inch medium density fibreboard (MDF)
- 2-inch drywall screws
- Electric drill
- Carpenter's glue
- Non-hardening rope caulk
- Silicon caulk
- Panhead sheet metal screws
- Speaker terminal cup
Planning a Subwoofer Box Design
This section will show you the steps to follow to determine the box's dimensions and the design:
Determining minimum depth
To get the minimum depth of your subwoofer box, no matter the size, you should start by measuring the subwoofer's depth. The depth refers to the front to back box dimensions, where the woofer is mounted at the front. Measure your subwoofer's depth and add to that 2 inches. This space is going to give the subwoofer room.
Determining the minimum width and height
Start by measuring the frame diameter of the subwoofer. You can also check the mounting plate on the manual, if it has one, to know the minimum width and height for your box. If you are planning on mounting a grille, make sure you allow additional space to accommodate the grille.
Measuring the storage space
The next step is measuring the dimensions; height, depth, and width, of the vehicle. You can determine the amount of space that you want the box to fit in.
Sketch the design
Once you have the measurements down, you are going to move on to sketching. Sketch on a piece of paper the design of the box using the dimensions you have. There can be many shapes, like a wedge or a rectangular box, pick one that is easier for you.
Determining the box's internal dimensions and volume
The sketch that you have drawn represents the outside of the box. Now you are going to determine the dimensions for the inside. To do that, subtract from the external dimensions the thickness of the wood you will use.
Calculating the internal box volume
Using the internal dimensions, you can now calculate the internal volume of the box. Use the formula Height × depth × width to get the volume in cubic meters. If you are going to make a wedge-shaped box, you will have to find the average depth before determining the volume. To get the average depth, you will have to add the two depth measurements the divide them in half.
Converting inches to feet
Since the measurements you take are going to be in inches, you will need to convert them into feet, because the volume is in cubic feet. To change cubic inches to cubic feet, you will divide the cubic inches by 1,728.
Adjust the volume to fit the subwoofer's specifications
Compare your box's volume to the manufacturer's recommendation. Adjust the measurements accordingly. It does not have to be a perfect fit, your dimensions should match as closely as possible. Check to see if your subwoofer's manual has a range of enclosure volumes and pick the one that is close to the recommended range.
Determining the final exterior dimensions
After you have checked and adjusted the internal dimensions, you now go back to get the internal dimensions. For the wedge-shaped box, you will add back the measurements you subtracted to get the internal dimensions. Check if the dimensions will fit in your car and adjust if necessary.
The above directions are for helping you get the design for a subwoofer box no matter the size. Now, we are going to move on to different sizes of subwoofers and how to design their boxes.
Read >>Best MTX Subwoofers in 2024– Guide & Reviews
Subwoofer Box Design for 8 Inch

To start us off we are going to look at the subwoofer box designs for an 8-inch subwoofer.
8 inch subwoofer box plans
Height= 10.24 inches
Width= 14.96 inches
Depth 1= 6.99 inches
Depth 2= 7.01 inches
Mounting= 5 inches
Internal volume= 0.38 cubic feet
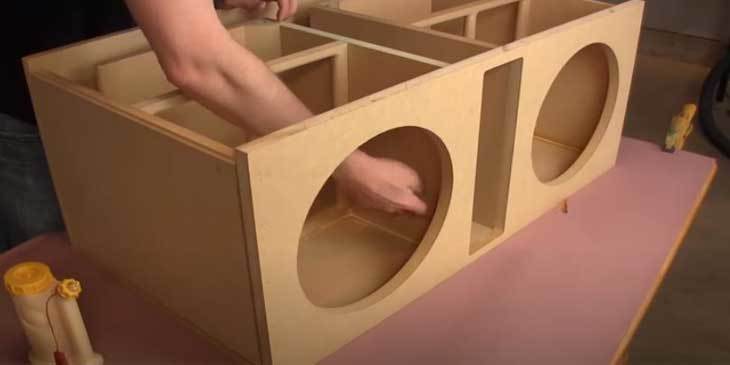
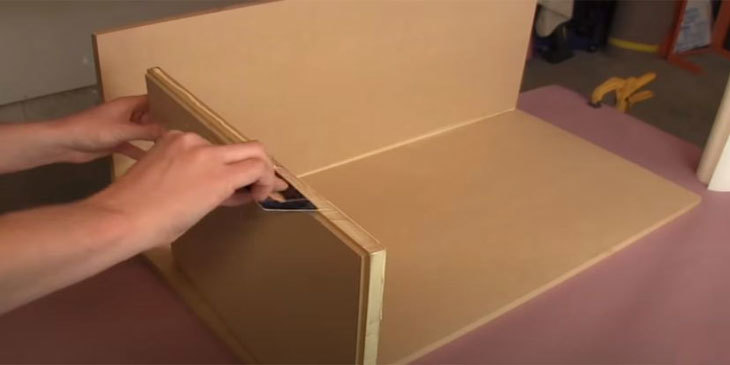
- Start by measuring and cutting pieces of the wood you are going to use. Cut the front, back, sides, and top of the box. Do this using a carbide-tipped blade table saw. You can also have your wood cut for you in some hardware stores. A circular saw can also be used as long as the cuts remain smooth and flat.
- Use a compass, or a template included in the packaging, to mark the cut-out on the front pieces. Make this marking on one of the two front pieces.
- This method uses a double thickness MDF board for the front panel; it is the best way to make the box strong and non-resonant). Fasten the two front pieces using carpenter's glue and metal screws.
- If you are not using the double thickness MDF, use bracing somewhere else on the box to add strength. You must use bracing, especially if the box is bigger than a cubic foot. Make the bracing strong because the box will bear strong internal pressure. To make the bracing, glue, and screw 2x2" strips of lumber. Attach them along the seams of two seams before you attach the top and bottom.
- Make a hole inside the circle using a drill press, and you can also use a handheld drill with large drill bits. The hole should be big enough for a jigsaw blade to fit in.
- Cut the hole out using a jigsaw to make the woofer's opening.
- Using the same drilling and jigsaw procedure, make a rectangular hole at the back panel. This space is going to hold the terminal cup. Run silicone caulk around the terminal cup's edge and screw it into place.
- Use screws to fasten all the sides together. You should also use plenty of carpenter's glue after drilling the screw holes. The glue is what will hold the box together, so use a moderate amount.
- Fasten the pieces using the cordless drill and 2" screws.
- After making sure the box is well fastened, drop the subwoofer in and ensure it fits. Use sandpaper or a rasp to make the hole larger if it is too tight.
- Use a pencil to mark the screw holes' location, remove the subwoofer, and mount the screws.
- Run a bead of silicone caulk over the box's internal seals to make sure everything is sealed tightly. Leave the caulk to cure for 24 hours before putting the subwoofer in. Silicone caulk can release acetic acid fumes that can destroy the subwoofer surrounds.
- Hook speaker wires to the subwoofer and place it back in the box. Use non-hardening rope caulk to seal, and you are done. You can customize the box however you want.
Read >>Best Yamaha Subwoofers
Subwoofer Box Design for 10 Inch

For this design, you are going to follow the outlines listed above. Once you have your measurements down, you can move on to making the subwoofer box. If you doubt the measurements, you can use a free subwoofer box design software that will help you out. The 10-inch subwoofer box plans are going to be the same as those listed above, just adjust the measurements where necessary.
10 inch subwoofer box plans
Height= 14-½ inches
Width= 49 inches
Depth 1= 5-½ inches
Depth 2= 8 inches
Mounting= 5-½ inches
Internal volume= 1.25 cubic feet
- Once you have the design you want and the materials needed, start by marking the edges. Mark a ¾ inch edge on the pieces to stay within your limits.
- Use a smaller drill bit than your screws and make straight pilot holes that fit within the marked edges.
- To get the center of the wood pieces, draw a line from corner to corner. The circle should be big enough for your speaker to fit in and have space for the lip to hangover. Place a nail at the center point and tie a string around it and to a pencil. This procedure is going to guide you to make a perfect circle. If your subwoofer comes with a template, then you can just use it and save yourself some time.
- The next step is cutting a circle. You can use a jigsaw for the hole. Drill a large hole inside the previously drawn circle then start cutting the hole. You can also use the same process for cutting a terminal cup opening.
- Use wood glue between the boards before drilling to seal the boards tightly and then drill them together.
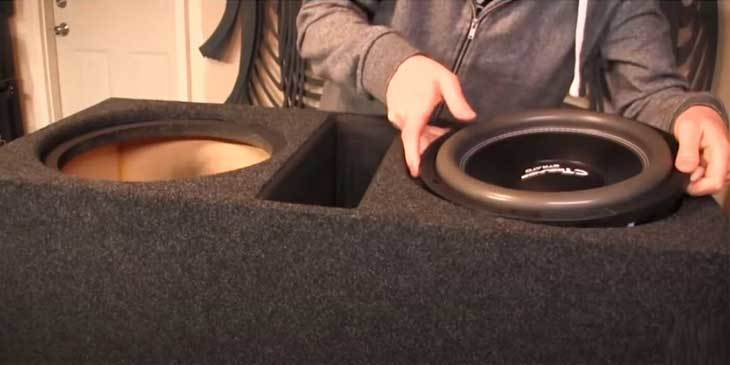
- You can also choose to carpet your box or customize it however you want.
Read >> Best Shallow Mount 12 Subwoofers
Subwoofer Box Design for 12 Inch

After getting your 12-inch subwoofer box dimensions, it is now time to move on to the assembling of the subwoofer box. Keep your 12-inch sub box plans in mind while making these measurements.
12-inch subwoofer box dimensions
Height- 14-¼ inches
Width- 48-¾ inches
Depth 1= 5-½ inches
Depth 2- 7-¾ inches
Mounting= 5-¼ inches
Internal volume= 1.25 cubic feet
- Measure and cut the main pieces of your wood piece using a table saw. You can cut top, bottom, two sides, back, and two pieces at the front for your box.
- Use a compass, ruler, template, or the method mentioned above to get the center. Mark the cut-out using a pencil
- Use a drill bit to make pilot holes within the marked surroundings to make an opening for the woofer and the opening where you will place the terminal cup.
- You can either brace the box using a double thickness MDF at the front panel, or thick pieces of lumber at the seams. This will strengthen the box and make a non-resonant mounting surface.
- Screw the pieces together. You can use wood glue to fasten them together before the screws to make the seals airtight.
- Now fasten all the pieces together. Squeeze wood glue between the pieces for extra fortification.
- Place the subwoofer into its box and check if it fits. Make the necessary changes to ensure it fits so you can get an adequately sized box.
- Wait for the glue to dry then run some silicone caulk over the internal seals. Let the caulk cure for a day before replacing the subwoofer.
- Decorate it however you want, and you are done.
Best Subwoofer Box Design for Deep Bass
There are many subwoofer box designs, and they all have specific use. If you want a box that can handle a deep bass, then there is only one way you can go; the sealed box.
This sealed box is an airtight enclosure that houses your subwoofer. You can use it for any music that requires a tight, deep bass. It has a flat response but a deep bass extension. A sealed box enclosure also has excellent power handling. This kind of enclosure requires a lot of power, so you should use it with an amplifier. The amplifier should have ample wattage to ensure you get optimum performance.
If You Want to Buy Subwoofer click here .
Conclusion
There are many subwoofer box designs available, including the sealed enclosure and the double enclosure. The design for the box is going to depend on you. The kind and size of the subwoofer and subwoofer box are also going to rely on you. After making all these choices, it is easy to make the subwoofer box.
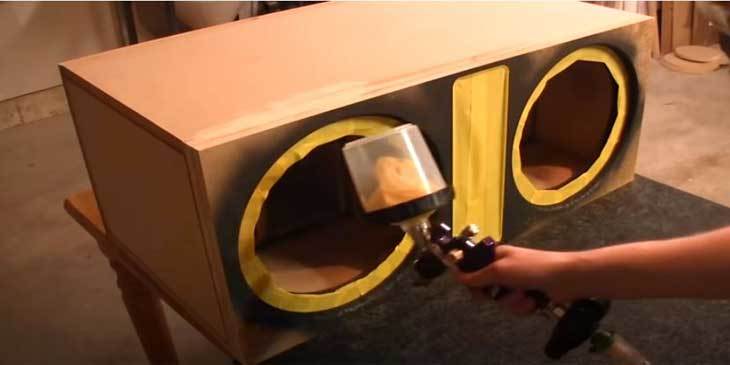
All you need is some wood, preferably MDF, since it is better and producing and retaining sound, carpenter's/ wood glue, a few screws, and a jigsaw. You can get any design you want, and you can customize your box the way you like. You can choose a carpet finishing if you don't want a lot of noise, or you can choose to paint the box.
The beauty of making your subwoofer box is that all the choices will depend on you. Just make sure you have the correct measurements. The measurements are going to ensure you get a perfect size box for your subwoofer. Be careful to make airtight seals get the maximum output. Get the perfect, or close to perfect measurements, choose a design, gather the required materials, and you are ready to make your subwoofer box.

